Before you can start sending data to Geckoboard, you have to create a dataset in which you define exactly the values you are sending from babelforce to Geckoboard. We will discuss a number of use cases later, here we will just go through the setup steps before sending data.
Setting up the Postman collection and environment
Follow this Link to download the files for your Postman. Import the collections and the environment.
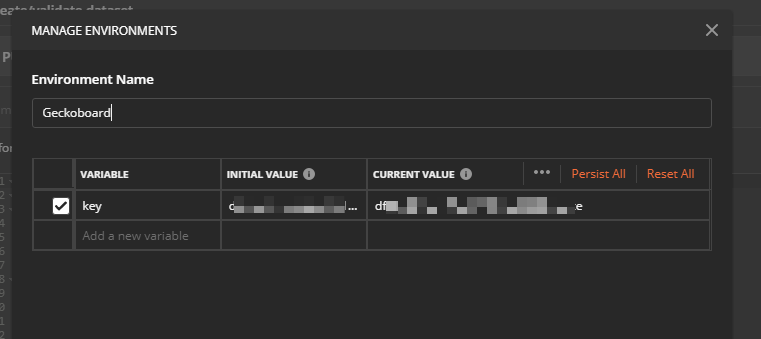
You will need your Geckoboard API key again (see also this article to find your API key). Pass it in the environment.
Check if it worked by running the "Check authentication" collection. If {} is returned all is setup to go.
Creating a new dataset
To create your new dataset, go to the collection "Create/validate dataset".
You do a couple of things.
In the PUT url, you enter the name of the dataset you want to create (in my example below it's test.katrin2). Each dataset needs to have a unique name. (See also upper red box in screenshot below.)
The other red box circles one data point (or fields as it's called in Geckoboard). What it does:
- "queuename" = name of the field (you freely define it, needs to be lower case, no special characters)
- "Type" = here you define what kind of data you send. Find all available types here: https://developer.geckoboard.com/#schemas-and-types
- "name" = this is the name of the dataset as it will appear in Geckoboard
- "option" = you define if the data point has to be send every time or not

WATCHOUT: the name of the data point cannot contain any special characters, only single words (no ./-, etc.). Even though the dataset will be created, you will not be able to send data from babelforce to Geckoboard if the data point name contains for instance a ".".
We added another code example below. As you can see, we created two fields:
- Agent Name (agentname = string)
- Call Duration (callduration = number)
You can also see that we added a unique identifier.
{
 "fields": {
 "agentname": {
 "type": "string",
 "name": "Agent Name",
 "optional": false
 },
 "callduration": {
 "type": "number",
 "name": "Call Duration",
 "optional": false
 }
 },
 "unique_by": ["duration"]
}
In case you don't want a unique identifier, just change the code as follows:
{
 "fields": {
 "agentname": {
 "type": "string",
 "name": "Agent Name",
 "optional": false
 },
 "callduration": {
 "type": "number",
 "name": "Call Duration",
 "optional": false
 }
 }
}
When you're done, hit Send. You will get a positive response if you successfully added the dataset.
One important thing to keep in mind: you are not able to extract the data field names (in our example "agentname" and "callduration") from Geckoboard after you created them. So make sure you either save them in Postman or somewhere else. Otherwise you might not know how to setup your Automations in babelforce later on as they are based on these field names (see also this article). Also, you cannot edit them later on. All you can do is delete a dataset.
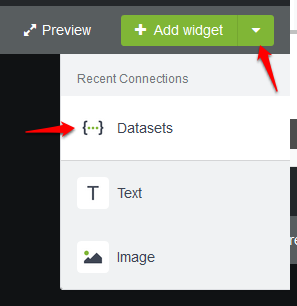
Finding the dataset in Geckoboard
Log into Geckoboard. Top left you see + Add widget. Click on the down pointing arrow and you will see {...} Datasets. In the list you should find the one you just created.
To learn how you can integrate babelforce with Geckoboard, read this article.
We discuss a use case on how to send data from babelforce to Geckoboard here.
Comments
0 comments
Please sign in to leave a comment.